Context接口的四个API
Context 接口核心 API 有四个:
- Deadline :返回过期时间,如果 ok 为 false,说明没有设置过期时间。不常用
- Done:返回一个 channel,一般用于监听 Context 实例 的信号,比如说过期,或者正常关闭,常用
- Err:返回一个错误用于表达 Context 发生了什么。Canceled => 正常关闭 DeadlineExceeded => 过期超时。比较常用。
- context.Value:取值。设置键值对,并且返回新的context实例,非常常用
前面三个都是返回一个可取消的context实例和取消函数。
err()~是超时还是调用取消?
demo1
1
2
3
4
5
6
7
8
9
|
func TestERR(t *testing.T) {
	ctx := context.Background()
	timeoutCtx, cancel := context.WithTimeout(ctx, time.Second)
	defer cancel()
	time.Sleep(2 * time.Second)
	err := timeoutCtx.Err()
	fmt.Println(err)
}
|
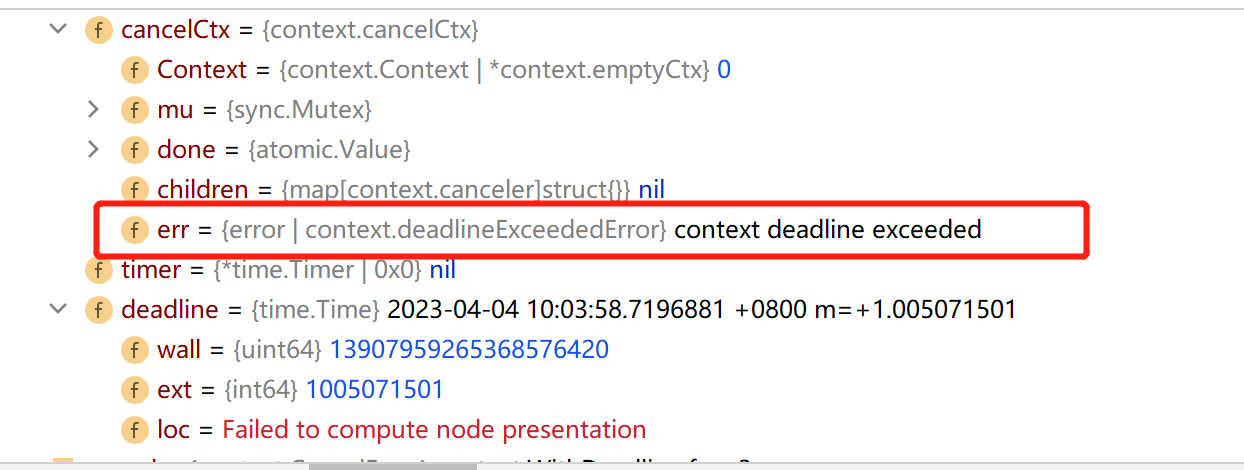
断点调试一下

分析
可以看到,err的值是context deadline exceeded 这说明是超时过期了,不是主动去调用的cancel,我们再看下面这个例子
demo2
1
2
3
4
5
6
7
8
| func TestERR1(t *testing.T) {
ctx := context.Background()
timeoutCtx, cancel := context.WithTimeout(ctx, time.Second)
time.Sleep(500 * time.Millisecond)
cancel()
err := timeoutCtx.Err()
fmt.Println(err)
}
|
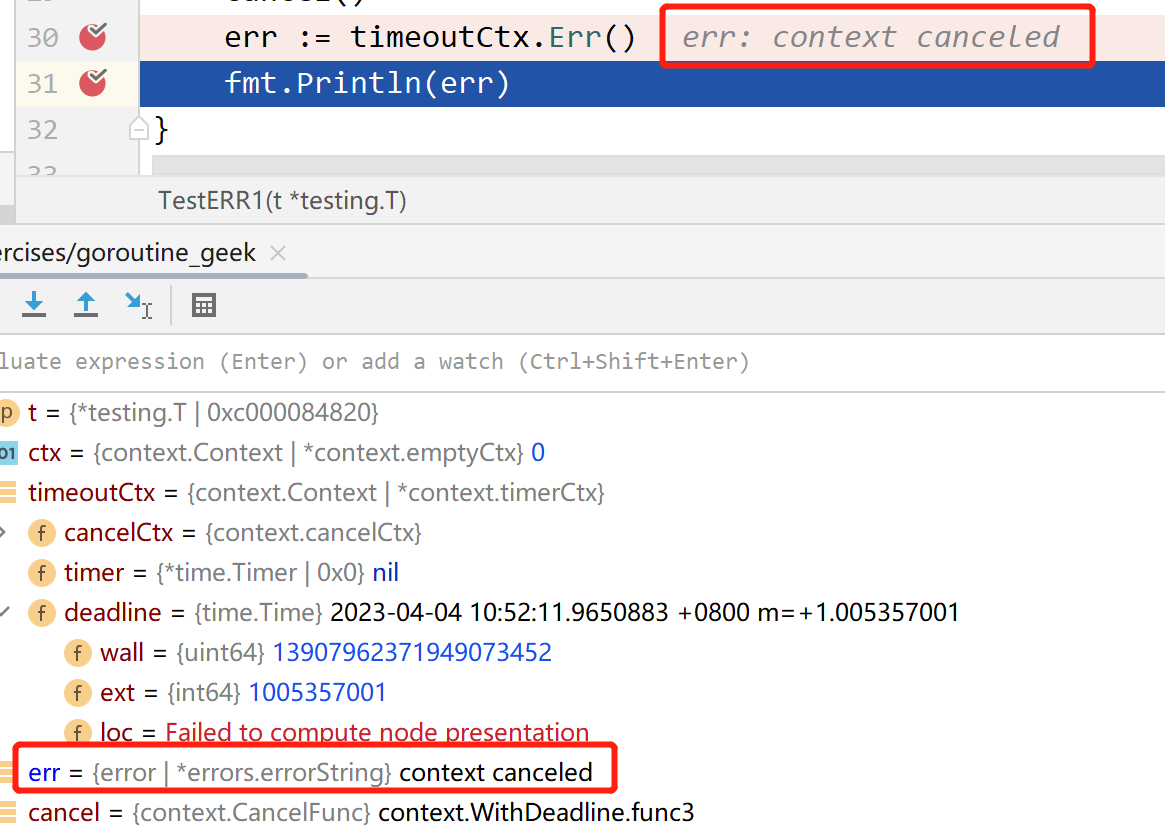
再debug一下,来看。这个时候就是cancel了。说明是手动调用生效,而不是因为超时。

demo3
分析
通过这两个例子,如果我们想知道究竟是因为超时退出了程序,还是因为在程序中主动调用cancel退出的程序,就可以使用err方法进行判断了,这在实际定位问题中会给我们带来很大帮助。我们来看一个模拟程序
 1
 2
 3
 4
 5
 6
 7
 8
 9
10
11
12
13
14
15
16
17
18
19
20
21
22
23
24
25
26
27
28
29
30
31
32
33
34
35
36
37
38
| var wg sync.WaitGroup
var notify bool
func TestMerror(t *testing.T) {
ctx, cancel := context.WithTimeout(context.Background(), time.Millisecond*50)
wg.Add(1)
go worker(ctx)
go func() {
for {
if notify {
cancel()
}
}
}()
time.Sleep(time.Second * 5)
err := ctx.Err()
fmt.Println(err)
wg.Wait()
fmt.Println("over")
}
func worker(ctx context.Context) {
LOOP:
for {
fmt.Println("db connecting")
notify = true
time.Sleep(time.Millisecond * 10)
select {
case <-ctx.Done():
break LOOP
default:
}
}
fmt.Println("worker done")
wg.Done()
}
|
输出结果
1
2
3
4
| db connecting.....
worker done
context canceled
over
|
分析
在上面的示例中,主程序开启了两个子goroutine,一个是worker,另外一个是notify,一直检测notify值。worker中打印一次后,就将notify置为true,被这个goroutine检测到,就调用了cancel()。于是,worker退出,打出worker done
看官方示例中err的解释, 对于一些不明白的地方,可以去看官方解释,很有帮助!Go文档里面写的十分细致。
1
2
3
4
5
6
| // If Done is not yet closed, Err returns nil.
// If Done is closed, Err returns a non-nil error explaining why:
// Canceled if the context was canceled
// or DeadlineExceeded if the context's deadline passed.
// After Err returns a non-nil error, successive calls to Err return the same error.
Err() error
|
deadline()
1
2
3
4
5
6
7
| func TestContext1(t *testing.T) {
ctx := context.Background()
timeoutCtx, cancel := context.WithTimeout(ctx, time.Minute*3)
defer cancel()
dl, ok := timeoutCtx.Deadline()
fmt.Println(dl, ok)
}
|

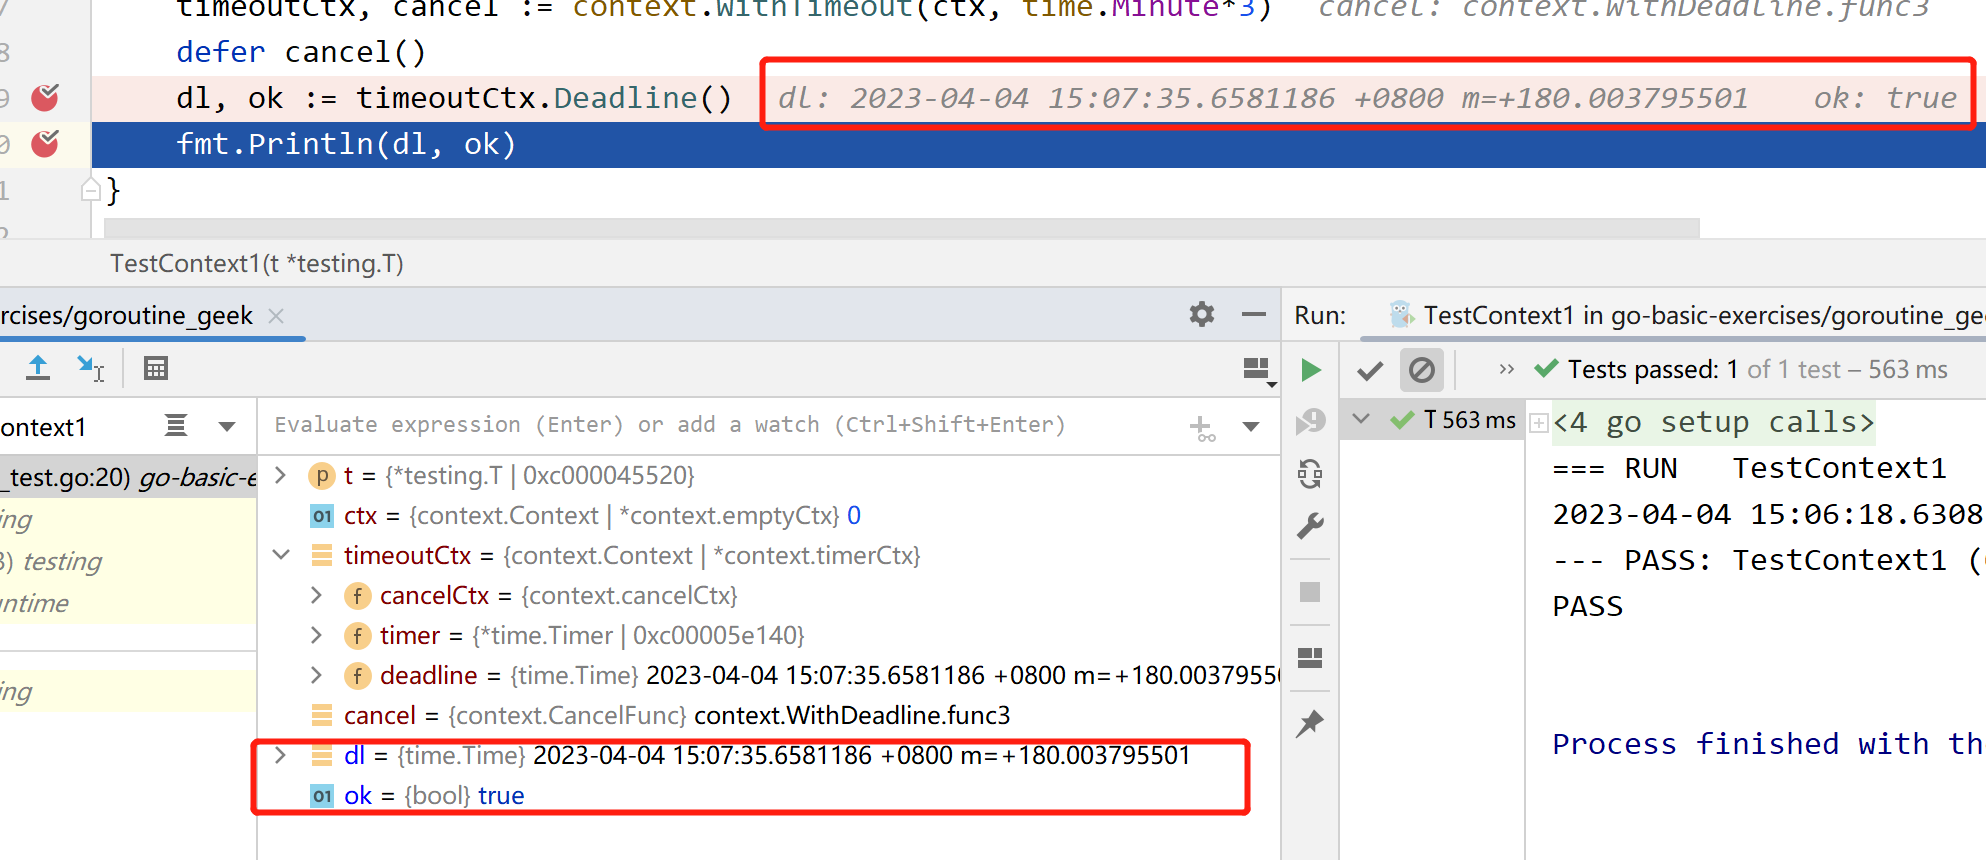
看上面的debug,dl指向的是预计的过期时间。true表示确实设置了过期时间。
1
2
3
4
5
| func TestContext2(t *testing.T) {
ctx := context.Background()
dl, ok := ctx.Deadline()
fmt.Println(dl, ok)
}
|
这个没有设置过期时间的,打印结果是
1
| 0001-01-01 00:00:00 +0000 UTC false
|
debug
在学习的过程中,debug是一项很重要的技能。不明白的可以进行debug,会更容易发现问题所在
value()
1
2
3
4
5
6
| func TestContext3(t *testing.T) {
ctx := context.Background()
valCtx := context.WithValue(ctx, "abc", 123)
val := valCtx.Value("abc") //123
fmt.Println(val)
}
|
父子关系
控制是从上至下的
context 的实例之间存在父子关系: 当父亲取消或者超时,所有派生的子 context 都被取消或者超时。
1
2
3
4
5
6
7
8
| func TestContext4(t *testing.T) {
ctx := context.Background()
dlCtx, cancel := context.WithDeadline(ctx, time.Now().Add(time.Minute))
childCtx := context.WithValue(dlCtx, "key", 123)
cancel()
err := childCtx.Err()
fmt.Println(err)
}
|
分析
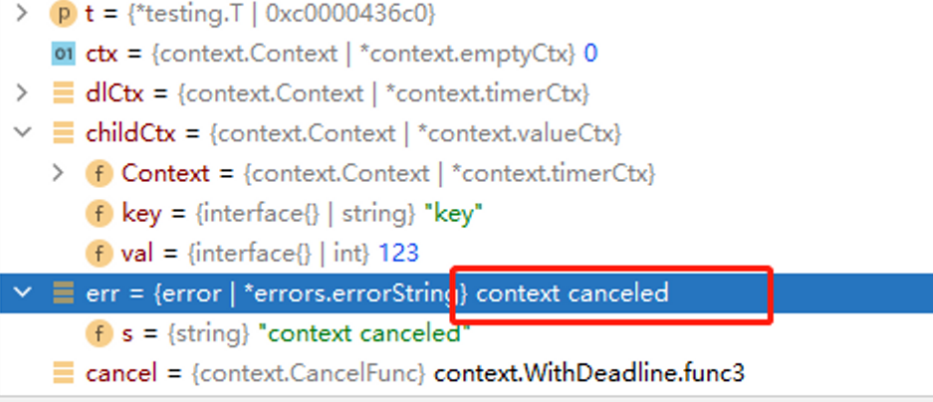
上面程序有一个父context,由父context又派生一个子context,但是在程序中,我们主动调用了父的cancel后,可以看到,子的也取消了。

查找是从下至上的
查找是从下至上
查找是从下至上的。从值的当找 key 的时候,子 context 先看自己有没有,没有则去祖先里面找。
 1
 2
 3
 4
 5
 6
 7
 8
 9
10
11
| func TestContext5(t *testing.T) {
ctx := context.Background()
childCtx := context.WithValue(ctx, "key1", 123)
ccCtx := context.WithValue(childCtx, "key2", 12345)
val := childCtx.Value("key2") // 拿它儿子的肯定拿不到,nil
fmt.Println(val)
val = ccCtx.Value("key1") // 可以拿到它父亲的
fmt.Println(val)
}
|
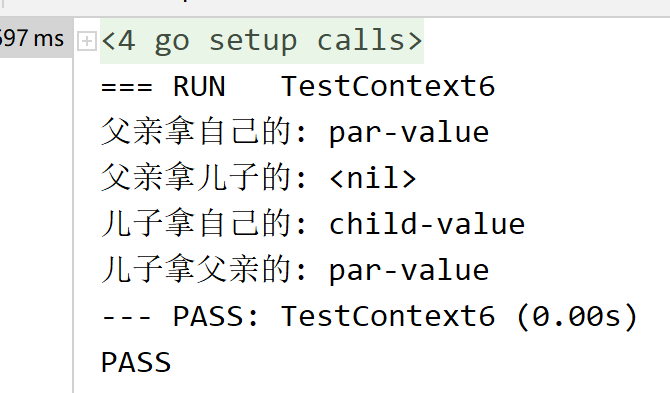
再来看一个更加形象的例子
1
2
3
4
5
6
7
8
9
| func TestContext6(t *testing.T) {
ctx := context.Background()
parent := context.WithValue(ctx, "par-key", "par-value")
child := context.WithValue(parent, "child-key", "child-value")
fmt.Printf("父亲拿自己的: %v\n", parent.Value("par-key"))
fmt.Printf("父亲拿儿子的: %v\n", parent.Value("child-key"))
fmt.Printf("儿子拿自己的: %v\n", child.Value("child-key"))
fmt.Printf("儿子拿父亲的: %v\n", parent.Value("par-key"))
}
|
输出

父ctx非要拿子ctx的value办法
 1
 2
 3
 4
 5
 6
 7
 8
 9
10
11
| func TestContext7(t *testing.T) {
ctx := context.Background()
par := context.WithValue(ctx, "map", map[string]string{})
child := context.WithValue(par, "key1", "value1")
m := child.Value("map").(map[string]string)
m["key1"] = "val"
val := par.Value("key1")
fmt.Println(val) //nil
val = par.Value("map")
fmt.Println(val) //val
}
|
注意点
- 这种方法通过中转的形式拿到了数据
- 不到逼不得已不要这么用,改变了context的不可变性。所以不要传map,指针之类的数据
可以看到,父亲拿儿子的是拿不到的,但是父亲拿自己的map,得到是儿子的值!这其实是儿子给父亲的!儿子把父亲map拿来,把自己的value放进去了!这样父亲不就拿到了!这次是儿子主动给的。这个例子就到此为止,不要深入研究了,其实传切片,指针,只要的共享内存地址的,都可以拿到。如果是指针类型都有可能被篡改,然后父亲就有可能拿到;map 和 切片底层都有指针,切片的情况比较复杂,但如果切片没有扩容缩容的话,应该可以拿到。
在实际应用中,是一个单向传递的过程,不会出现上面父亲非要拿儿子的情况,这种使用方式很危险,违背了context设计的初衷。context强调不可变性,可以更关注一下 key 该用什么,WithValue 的文档上面有写如何避免 key 的冲突;传进去的值一般不要改,给儿子们使用就行了。ctx 是用来做通知,而不是用来做逻辑流程控制的;既 “inform instead of control”。
valueCtx 实现
valueCtx 用于存储 key-value 数据,特点:
- 典型的
装饰器模式:在已有 Context 的基础上附加一个 存储 key-value 的功能 - 只能存储一个 key, val:为什么不用 map? map 要求 key 是 comparable 的,而我们可能用不是 comparable 的 key,context 包的设计理念就是将 Context 设计成不可变
tip
鼠标点进par.Value(“map”), 进入这个方法,会看到这个方法,点小箭头,去画圈的地方,去看看它是如何实现的。从源码里可以看到这是一个不断向上追溯的过程。
 1
 2
 3
 4
 5
 6
 7
 8
 9
10
11
12
13
14
15
16
17
18
19
20
21
22
23
24
25
| func value(c Context, key any) any {
for {
switch ctx := c.(type) {
case *valueCtx:
if key == ctx.key {
return ctx.val
}
c = ctx.Context
case *cancelCtx:
if key == &cancelCtxKey {
return c
}
c = ctx.Context
case *timerCtx:
if key == &cancelCtxKey {
return &ctx.cancelCtx
}
c = ctx.Context
case *emptyCtx:
return nil
default:
return c.Value(key)
}
}
}
|
超时控制
 1
 2
 3
 4
 5
 6
 7
 8
 9
10
11
12
13
14
15
16
17
18
19
20
21
22
| func TestBussinessTimeout(t *testing.T) {
ctx := context.Background()
timeoutCtx, cancel := context.WithTimeout(ctx, time.Second)
end := make(chan struct{}, 1)
go func() {
Mybusiness()
end <- struct{}{}
}()
select {
case <-timeoutCtx.Done():
fmt.Println("timeout")
case <-end:
fmt.Println("business end")
}
cancel()
err := timeoutCtx.Err()
fmt.Println(err)
}
func Mybusiness() {
time.Sleep(200 * time.Millisecond)
fmt.Println("hello Go")
}
|
分析
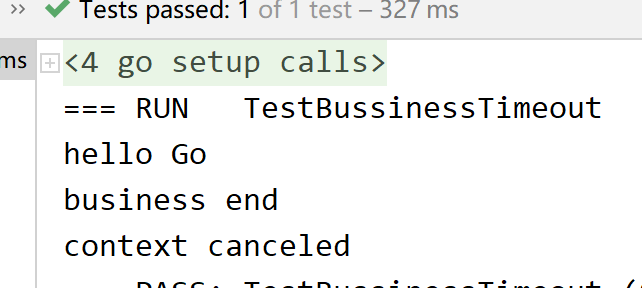
- 场景1: Mybusiness中睡眠时间0.5s,未超过设置的超时时间。走到第2个case,输出结果如下面左图
- 场景2: Mybusiness中睡眠时间2s,超过了设置的超时时间。走到第1个case,输出结果如下面右图


注意
cancel的位置,这里不要去defer cancel,如果最后才cancel,可能打的是nil,这个时候还没cancel呢。
三个控制方法
context包提供了三个控制方法,WithCancel、WithDeadline和WithTimeout。三者用法大同小异
- 没有过期时间,但是又需要在必要的时候取消,使用WithCancel
- 在固定时间点过期,使用WithDeadline
- 在一段时间后过期,使用WithTimeout
补充1~子ctx修改超时时间
补充示例
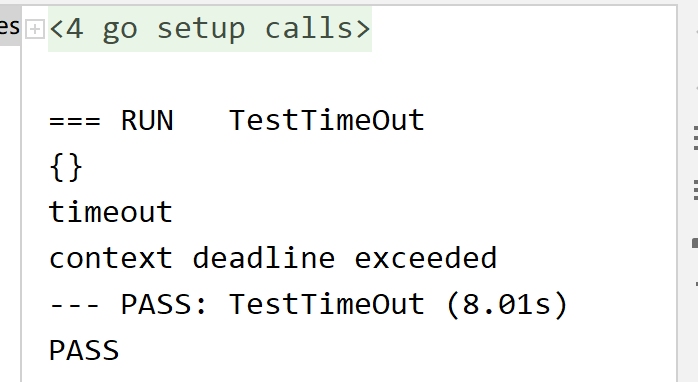
在Context基础篇里写了几个作为参考和帮助理解,就不详细介绍。这里要说明的是子context试图重新设置超时时间,然而并没有成功,它依旧受到了父亲的控制。可以看一下下面例子:
 1
 2
 3
 4
 5
 6
 7
 8
 9
10
11
12
13
14
| func TestTimeOut(t *testing.T) {
bg := context.Background()
timeoutCtx, cancel_parent := context.WithTimeout(bg, time.Second)
subCtx, cancel_child := context.WithTimeout(timeoutCtx, 10*time.Second)
go func() {
fmt.Println(<-subCtx.Done())
fmt.Println("timeout")
}()
time.Sleep(8 * time.Second)
//手动调用cancel
cancel_child()
errsub := subCtx.Err()
fmt.Println(errsub)
cancel_parent()
|

